2014.1.29 0:54
첨부된 study2.zip을 다운 받아 내용을 같이 보기 바람.
Sprite를 만들어서 Animation 시키는 방법들에 대한 예제는 아래에서 볼 수 있다.
아래의 예제는 위에 있는 여러가지 방법 중에 연속된 스프라이트를 플레이 시키는 내용이다.
Sprite를 사용하려면 아래의 순서를 따른다.
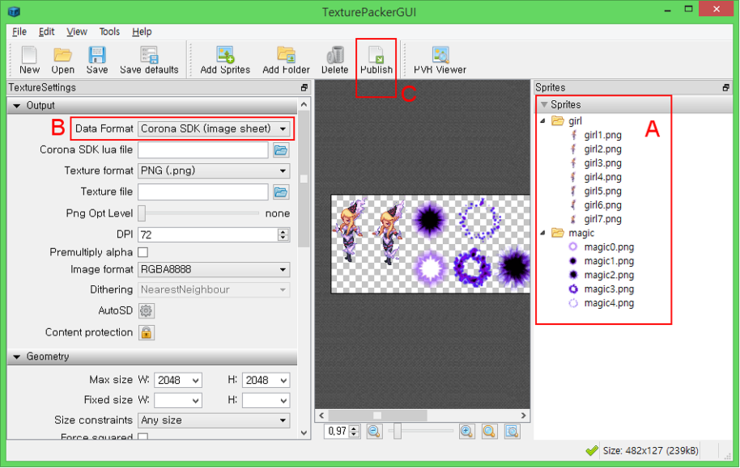
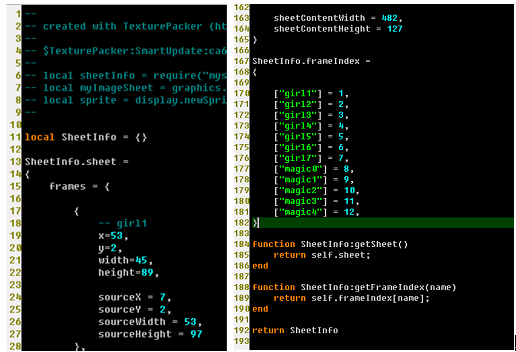
이미지 파일 정보 선언
이미지 파일 로딩
Animation Sequence Data 선언
Sprite 개체 생성 및 속성 설정
Play
각각의 소스는 아래와 같다.
이미지 파일 정보 선언
local sprImgData = {
width=150, -- 한 개의 Sprite width
height=150,
numFrames=8, -- 이미지 속에 들어있는 스프라이트 개수 , 150X150이 몇 개인지
sheetContentWidth=1200, -- 150인 것이 8개이면 1200
sheetContentHeight=150
}
이미지 파일 로딩
local sprSheet = graphics.newImageSheet( "images/parrot.png", sprImgData )
위에 선언한 것을 기준으로 파일을 읽는다.
Animation Sequence Data 선언
sequenceData =
{
{
name = "spr1", -- Animation Sequence의 이름
start=1, -- 몇번째에서 시작인가 , 처음이 1부터 시작
count=4, -- 이미지 몇장을 animation 할지
time=2000 , -- animation 시작부터 끝까지 걸리는 시간은
loopCount = 1 -- 몇번 반복할 것인가 ?
},
{
name = "spr2",
start=5,
count=4,
time=1000 ,
loopCount = 0}, -- loopCount값의 default는 0 (무한히 반복)
}
Sprite 개체 생성 및 속성 설정
local Spr1 = display.newSprite( sprSheet, sequenceData ) -- sprite object 생성
Spr1:setSequence( "spr1") -- animation sequence 이름 지정
Spr1.x = 200 -- 출력 좌표
Spr1.y = 200
Play
Spr1:play() -- 애니메이션 시작
Animation 출력되고 다른 Animation으로 전환 시키기
function SpriteListener(event)
if event.phase == "ended" then -- ⓐ
event.target:setSequence( "spr2")
event.target:play()
end
end
Spr1:addEventListener( "sprite", SpriteListener )
위 소스에서 Spr1:setSequence( "spr1") 을 통해서 첫번째 애니메이션이 시작되고
addEventListener()를 통해서 Animation 진행상태에 따라 SpriteListener() 함수를 호출 하게 된다.
ⓐ 를 보면 ,
첫번째 “spr1” Animation Sequence가 끝나면 두번째 “spr2”로 지정하는 것을 알 수 있으면 이것의 무한 루프로Animation 이 되기 때문에 계속 해서 loop를 도는 것을 알 수 있다.
SpriteListener() 함수에 아래와 같은 내용을 통해 디버그 창으로 진행 상황을 표시할 수 있다.
print( "Sprite event: " .. event.phase )
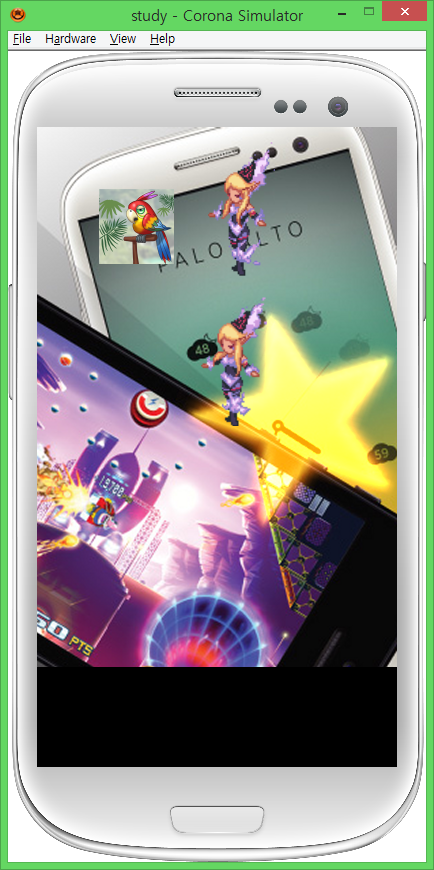
Corona에서는 기본적으로 blendMode 라는 속성을 통해서 add(dodge) , multiply, screen 등의 effect를 제공하고 있다.
dodge는 화염 효과등에(노란색/붉은색) 많이 사용되고 , multiply는 그림자, screen은 빛(흰색)나는 효과를 줄 때 많이 사용한다.
아래 소스는 이러한 효과를 체험 할 수 있게 한다.
local StarSpr = display.newImage( "images/star1.png" )
StarSpr.x = math.random(__OX, __W+__W/2)
StarSpr.y = math.random(__OY - 50 , __H/2 )
StarSpr.blendMode = "add" -- dodge
local nScale = math.random(1,5)
StarSpr.xScale = nScale -- 스프라이트 확대/축소
StarSpr.yScale = nScale
local OldTime = system.getTimer()
-- main process
function GameProgress()
if (system.getTimer() - OldTime > 2000) then
OldTime = system.getTimer()
StarSpr.x = math.random(__OX, __W)
StarSpr.y = math.random(__OY, __H )
nScale = math.random(1,5)
StarSpr.xScale = nScale
StarSpr.yScale = nScale
else
StarSpr.rotation = StarSpr.rotation + 10 -- 이미지/스프라이트 회전
nScale = nScale + 0.3
StarSpr.xScale = nScale
StarSpr.yScale = nScale
end
end
timer.performWithDelay(10, GameProgress ,0) -- 계속 호출 하려면 마지막에 0 값
performWithDelay()는 지정한 함수를(GameProgress) 호출한 뒤에 , 지정 시간 뒤(100) 다시 그 함수를(GameProgress) 호출 할 때 사용한다.