2014.1.29 0:54
첨부된 study2.zip을 다운 받아 내용을 같이 보기 바람.

Sprite 출력
|
Sprite를 만들어서 Animation 시키는 방법들에 대한 예제는 아래에서 볼 수 있다.
아래의 예제는 위에 있는 여러가지 방법 중에 연속된 스프라이트를 플레이 시키는 내용이다.
Sprite를 사용하려면 아래의 순서를 따른다.
- 이미지 파일 정보 선언
- 이미지 파일 로딩
- Animation Sequence Data 선언
- Sprite 개체 생성 및 속성 설정
- Play각각의 소스는 아래와 같다.
- 이미지 파일 정보 선언local sprImgData = {width=150, -- 한 개의 Sprite widthheight=150,numFrames=8, -- 이미지 속에 들어있는 스프라이트 개수 , 150X150이 몇 개인지sheetContentWidth=1200, -- 150인 것이 8개이면 1200sheetContentHeight=150}
- 이미지 파일 로딩local sprSheet = graphics.newImageSheet( "images/parrot.png", sprImgData )위에 선언한 것을 기준으로 파일을 읽는다.
- Animation Sequence Data 선언sequenceData ={{name = "spr1", -- Animation Sequence의 이름start=1, -- 몇번째에서 시작인가 , 처음이 1부터 시작count=4, -- 이미지 몇장을 animation 할지time=2000 , -- animation 시작부터 끝까지 걸리는 시간은loopCount = 1 -- 몇번 반복할 것인가 ?},{name = "spr2",start=5,count=4,time=1000 ,loopCount = 0}, -- loopCount값의 default는 0 (무한히 반복)}
- Sprite 개체 생성 및 속성 설정local Spr1 = display.newSprite( sprSheet, sequenceData ) -- sprite object 생성Spr1:setSequence( "spr1") -- animation sequence 이름 지정Spr1.x = 200 -- 출력 좌표Spr1.y = 200
- PlaySpr1:play() -- 애니메이션 시작
- Animation 출력되고 다른 Animation으로 전환 시키기function SpriteListener(event)if event.phase == "ended" then -- ⓐevent.target:setSequence( "spr2")event.target:play()endendSpr1:addEventListener( "sprite", SpriteListener )위 소스에서 Spr1:setSequence( "spr1") 을 통해서 첫번째 애니메이션이 시작되고addEventListener()를 통해서 Animation 진행상태에 따라 SpriteListener() 함수를 호출 하게 된다.ⓐ 를 보면 ,첫번째 “spr1” Animation Sequence가 끝나면 두번째 “spr2”로 지정하는 것을 알 수 있으면 이것의 무한 루프로Animation 이 되기 때문에 계속 해서 loop를 도는 것을 알 수 있다.SpriteListener() 함수에 아래와 같은 내용을 통해 디버그 창으로 진행 상황을 표시할 수 있다.print( "Sprite event: " .. event.phase )
- Event의 상태 변화는무한 play 일 경우begin -> next … next -> loop -> next … next -> loop : next는 animation cut 수에 따른다.1회 지정 play일 경우begin -> next … next -> ended
효과 ( dodge, screen 등등 )
|
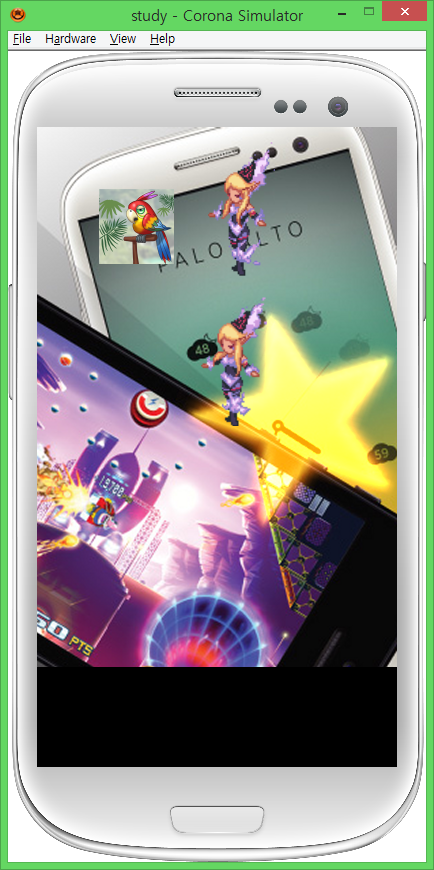
Corona에서는 기본적으로 blendMode 라는 속성을 통해서 add(dodge) , multiply, screen 등의 effect를 제공하고 있다.
dodge는 화염 효과등에(노란색/붉은색) 많이 사용되고 , multiply는 그림자, screen은 빛(흰색)나는 효과를 줄 때 많이 사용한다.
아래 소스는 이러한 효과를 체험 할 수 있게 한다.
local StarSpr = display.newImage( "images/star1.png" )
StarSpr.x = math.random(__OX, __W+__W/2)
StarSpr.y = math.random(__OY - 50 , __H/2 )
StarSpr.blendMode = "add" -- dodge
local nScale = math.random(1,5)
StarSpr.xScale = nScale -- 스프라이트 확대/축소
StarSpr.yScale = nScale
local OldTime = system.getTimer()
-- main process
function GameProgress()
if (system.getTimer() - OldTime > 2000) then
OldTime = system.getTimer()
StarSpr.x = math.random(__OX, __W)
StarSpr.y = math.random(__OY, __H )
nScale = math.random(1,5)
StarSpr.xScale = nScale
StarSpr.yScale = nScale
else
StarSpr.rotation = StarSpr.rotation + 10 -- 이미지/스프라이트 회전
nScale = nScale + 0.3
StarSpr.xScale = nScale
StarSpr.yScale = nScale
end
end
timer.performWithDelay(10, GameProgress ,0) -- 계속 호출 하려면 마지막에 0 값
performWithDelay()는 지정한 함수를(GameProgress) 호출한 뒤에 , 지정 시간 뒤(100) 다시 그 함수를(GameProgress) 호출 할 때 사용한다.
댓글 없음:
댓글 쓰기